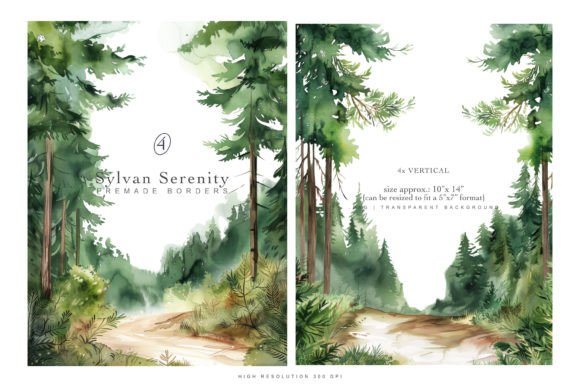
Watercolor Green Forest Premade Scenery
If you create digital content, design assets, or visual branding, you have likely searched for backgrounds that feel organic without requiring hours of manual painting. A Watercolor Green Forest Premade Scenery fills that gap beautifully. It offers the soft, natural texture of watercolor paint combined with the convenience of a ready-to-use file. You get a lush, layered green forest scene that can be dropped into projects immediately, saving time while maintaining a handcrafted aesthetic.
What makes this asset particularly useful is its versatility. The green tones range from deep pine to soft sage, often with gentle blending that mimics wet-on-wet watercolor techniques. The forest elements—trees, foliage, misty patches—are usually loosely defined, giving you room to layer text, graphics, or other elements without visual clutter. Whether you need a calming backdrop for a wellness blog or a fresh environment for a product mockup, this scenery works as both a main visual and a subtle texture.
What Makes Watercolor Green Forest Scenery Stand Out
Unlike hyper-realistic stock photos or flat vector illustrations, watercolor carries an inherent human touch. The slight unevenness in pigment saturation, the soft edges, and the occasional dry-brush effect all contribute to a feeling of authenticity. In a world of polished digital design, that organic quality helps your work feel approachable and warm.
A premade watercolor scene also removes the barrier of skill. You do not need to know how to paint, scan, or edit physical artwork. The file is already cleaned up, isolated or framed, and ready for use in standard design software. This makes it a practical choice for small business owners, freelancers, and educators who want professional-looking visuals without hiring an illustrator.
Common Characteristics of These Assets
- Multiple layers of green: dark background washes, mid-tone foliage, and lighter highlights create depth.
- Soft, ethereal transitions: edges bleed into the background or fade to white, making overlay easy.
- Loose composition: the forest is suggested rather than outlined, giving you flexibility to crop or reposition.
- Transparency options: many files come with a transparent background (PNG) or a light paper texture (JPG).
These features mean you can use the scenery as a full-page background, a narrow banner, or even a circular profile frame. The visual weight stays balanced, and the green palette works well with neutral, gold, or white accents.
Creative Applications Across Audiences
Different users can adapt this scenery to fit their specific goals without altering the core asset. Here are ways various professionals have made it their own.
For Designers and Creative Freelancers
If you design social media templates, website headers, or print materials, the Watercolor Green Forest Premade Scenery gives you a reliable base. You can overlay semi-transparent rectangles for text areas, add gold foil textures, or combine it with botanical illustrations. The green tones reduce eye strain on screens, making them suitable for long-form articles or e-book covers.
A practical example: a wellness coach hired a freelancer to create a set of Instagram story backgrounds. Using a green forest wash as the foundation, the designer added white hand-lettered quotes and small leaf icons. The client reported higher engagement because the visuals felt calming and consistent with their brand values. The premade scenery saved the designer hours of painting custom backgrounds for each post.
For Bloggers and Content Creators
Bloggers in niches like nature, mindfulness, sustainability, or travel can use this scenery as a recurring visual element. It works as a blog post background, a featured image overlay, or a divider between sections. Because the watercolor style is less rigid than photography, it pairs well with both serif and sans-serif fonts.
Try this: when writing an article about forest bathing or seasonal changes, place the scenery behind a title slide. Adjust opacity to 30–40% so the text remains legible. The soft green backdrop instantly sets a mood without competing with your words. For consistency, use the same scenery file across a series of posts—just crop differently or rotate it to keep each image unique.
For Educators and Workshop Leaders
Teachers and online course creators often need visuals that look professional but do not distract from content. A watercolor green forest scene works as a slide background for nature studies, geography lessons, or creative writing prompts. You can also use it to frame a quote or a key concept.
Example: a nature school built a series of PDF worksheets for children. Each page featured a small corner of the forest scenery as a visual anchor, leaving the rest of the page white for writing. The watercolor element made the worksheets feel inviting without overwhelming the young learners. Since the scenery was premade, the teacher could focus on lesson content rather than design.
For Small Business Owners and Entrepreneurs
Product packaging, business cards, or e-commerce store banners all benefit from a unique background. A premade watercolor green forest can be used as a wrap for small product boxes, a backdrop for flat-lay photos, or a repeating pattern if you tile it carefully. The natural theme suits brands focused on eco-friendly, organic, or handmade goods.
Consider a soap maker who sells forest-scented products. Instead of buying expensive custom photography, they used the scenery as a digital background for product labels and social media posts. They paired it with a simple logo in a clean sans-serif font. The cohesive look helped their Etsy shop feel polished, and customers often commented on the “artistic” packaging.
How to Keep Results Clear and Effective
Using a premade asset does not mean you should stop designing. Small adjustments ensure your final piece looks intentional rather than generic.
- Mind the contrast: dark green backgrounds need light text (white, cream, pale yellow). For light washes, dark text or bold colors work better.
- Add a subtle overlay: a soft black or white gradient at 10–20% opacity can improve text readability while preserving the watercolor feel.
- Crop with purpose: avoid centering the busiest part of the forest behind text. Instead, position the detailed foliage off to one side.
- Respect the resolution: check the file size before printing. Most premade scenery is meant for digital use or small print, but some vendors offer high-resolution versions.
Consistency matters when you use the same scenery across multiple pieces. Note the exact crop and opacity settings you applied so you can repeat them for future projects. This creates a cohesive brand library without reinventing the process each time.
Variations to Explore
Not all Watercolor Green Forest Premade Scenery files look the same. Some feature dense, layered forests with visible tree trunks, while others show a more abstract blend of green washes. Knowing the variations helps you choose the right one for your project.
- Minimalist wash: a single green sweep with faint tree silhouettes. Best for elegant business materials or background textures where you need maximum negative space.
- Layered canopy: multiple shades of green overlapping, often with lighter patches suggesting sunlight. Works well for storytelling and immersive backgrounds.
- Seasonal shift: some sets include yellow-green or blue-green tints to imply spring or winter. Choose the undertone that matches your brand palette.
- Horizontal vs. vertical orientation: landscape formats suit website headers, while portrait orientations work for mobile posts or book covers.
You can also combine two different watercolor forest scenes by blending them in Photoshop or Procreate. For example, use a deep green wash at the top and a lighter mint wash at the bottom to create a gradient effect. This extends the life of your premade assets and lets you tailor colors precisely.
Practical Recommendations for Getting Started
If you are new to working with watercolor textures, start with a single scene and test it in several contexts before buying a bundle. Many marketplaces offer preview files at low resolution so you can see how the colors and composition behave on your own designs.
Store the file in a folder labeled “backgrounds” with a clear naming convention like “watercolor_green_forest_01.png”. This makes future searches quick. When using the scenery on the web, compress it without losing too much quality—JPEG at 80% quality or PNG with lossy compression often balances file size and visual fidelity.
Finally, do not be afraid to break the rules. The charm of watercolor lies in its imperfect edges. If you overlap the scenery with another texture or add a subtle grain overlay, you may discover a result that feels entirely custom. The premade scenery is a starting point, not a final destination.
Bringing It All Together
The Watercolor Green Forest Premade Scenery is more than a quick download—it is a flexible creative resource that adapts to many voices and visions. Whether you are a designer tightening a brand palette, a blogger building a visual narrative, or an entrepreneur crafting a cohesive customer experience, this type of asset saves time while adding a layer of authenticity that polished stock imagery often lacks.
By understanding its properties, experimenting with placement and opacity, and matching it to your audience’s expectations, you can make a single premade scene feel like a custom painting. The result is work that looks thoughtful, feels human, and connects with people in a quiet, direct way—much like the forest itself.